
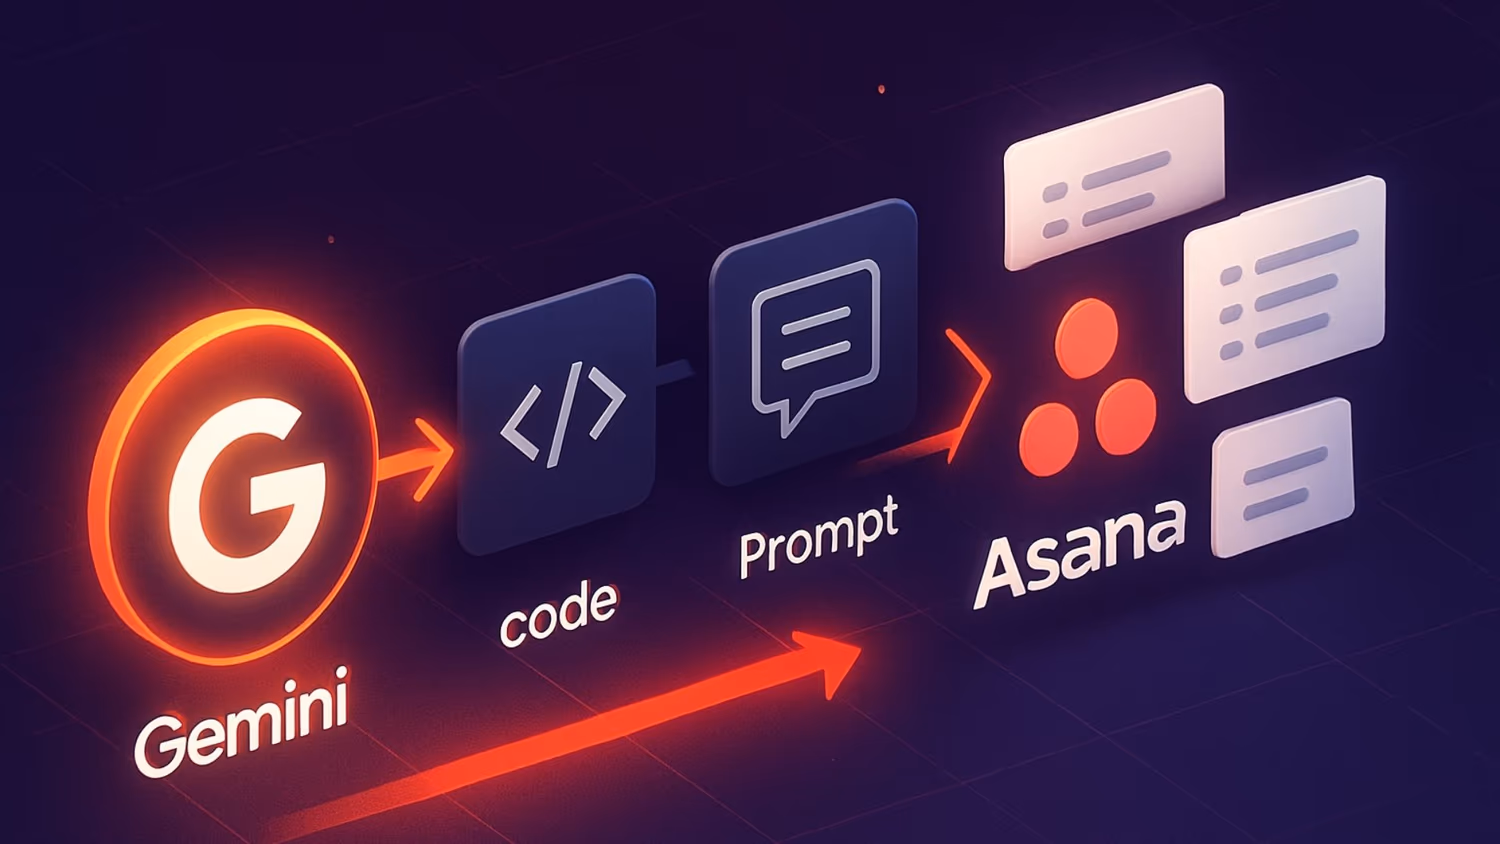
In the video walkthrough below, we guide you through setting up an automation using Make.com to automatically take the action items from Google Gemini's transcribed notes of your weekly calls and turn them into action items or tasks in Asana.
While this demonstration focuses on Asana, the concept can be applied to any work management tool, provided it has an API that allows you to push tasks into defined projects.
As a quick overview, my chosen method was to create dedicated projects for meetings and meeting notes. Once the meeting notes are received from Gemini as a Google Doc, the automation automatically triggers to extract the following actions and place them into a section for that specific meeting.
We will share some of the prompts and more detailed setup instructions we use, enabling you to replicate this for your organisation.
Step 1: Getting The Gemini Meeting Notes
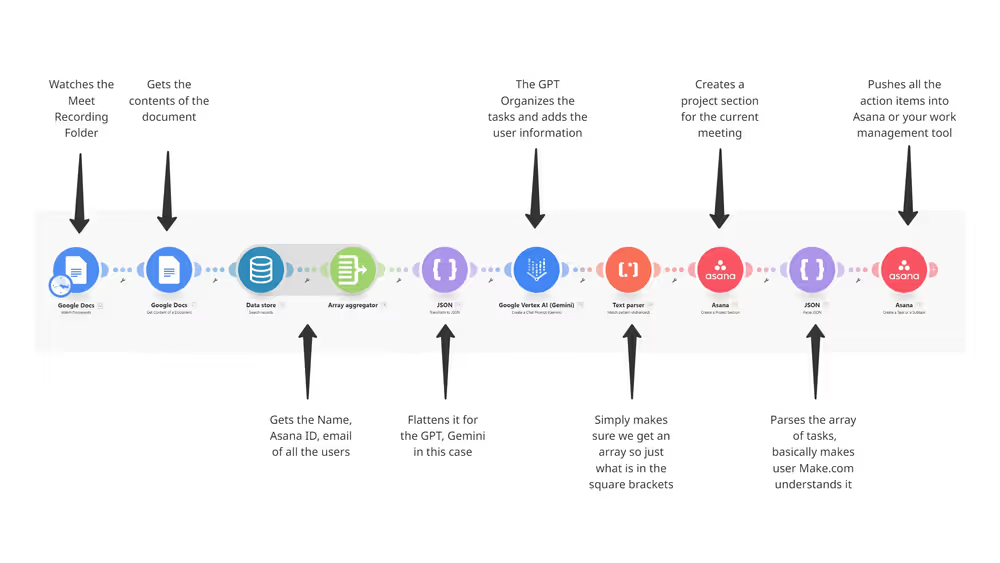
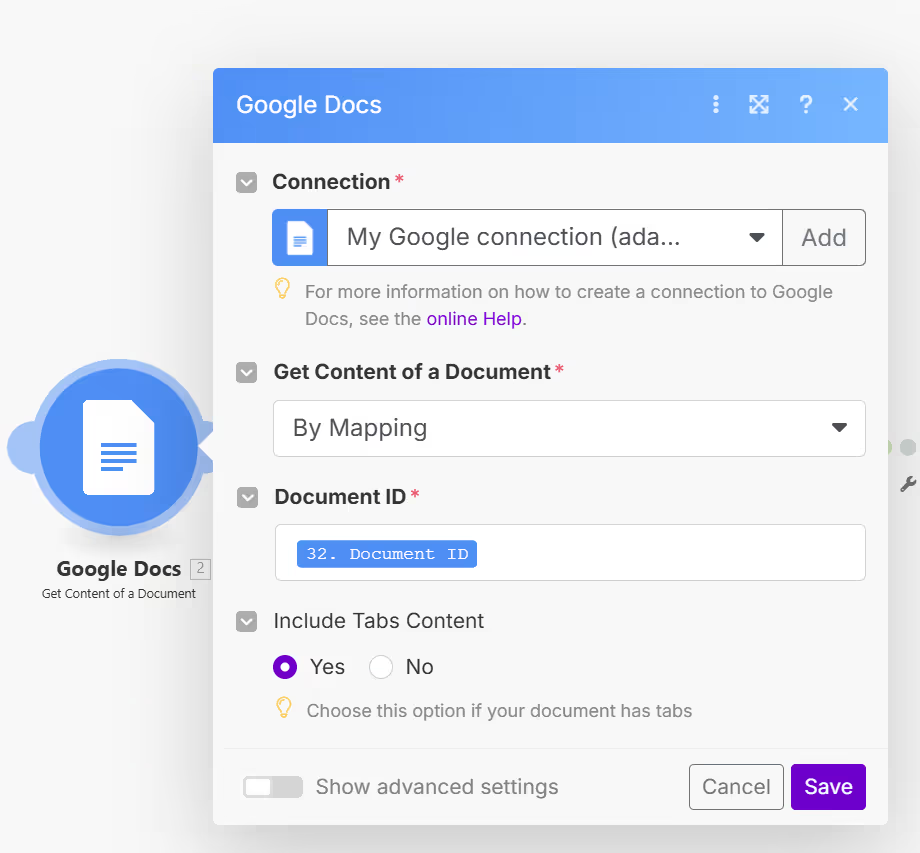
The first two modules in the Make scenario are straightforward. The starting module simply listens for any files added to the 'meat recordings' folder, and the second module then extracts the content from that document for further processing.

Step 2: Get the user information needed for Asana or Your Work Management Tool
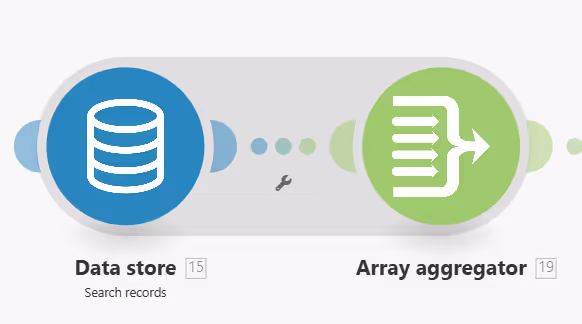
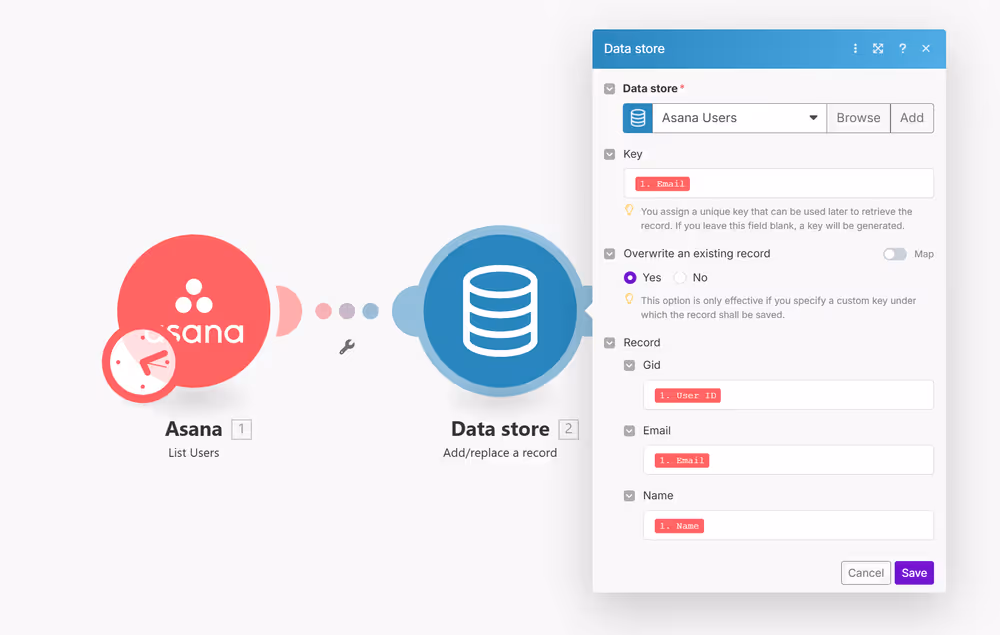
The next two modules describe how we have chosen to store all the user information that Asana will need to assign tasks to the correct users. We run a monthly call to Asana and build a data store in make.com containing the key information we need: the user's Asana ID, name, and email address.
This part of the scenario simply pulls all of that information together to feed the Gemini module, which is the next step.
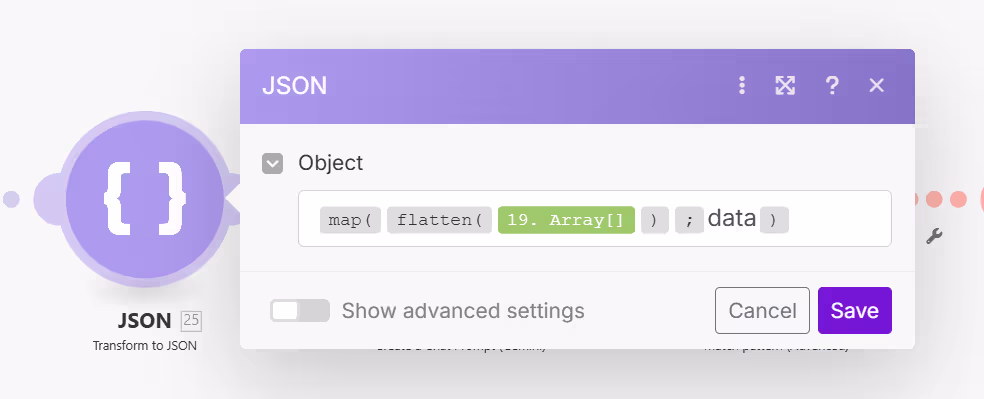
{{map(flatten(19.array); "data")}}
Just as a segue, below is the automation that we run monthly to populate our data store with that information. It is super simple, but we have added it here for completeness.
Step 3: Set up your GPT module to extract and map the tasks
Then, in the next module, the magic happens. Below, you'll see the setup for Google Gemini in more detail.
Again, we've used Gemini here because we were testing a few things with Gemini versus the OpenAI API, but the crucial things to share are the prompts we've used because they have been working well in production for a good few months now. They are pretty robust, and you can then lift these prompts and use them with whichever GPT you choose to work with.
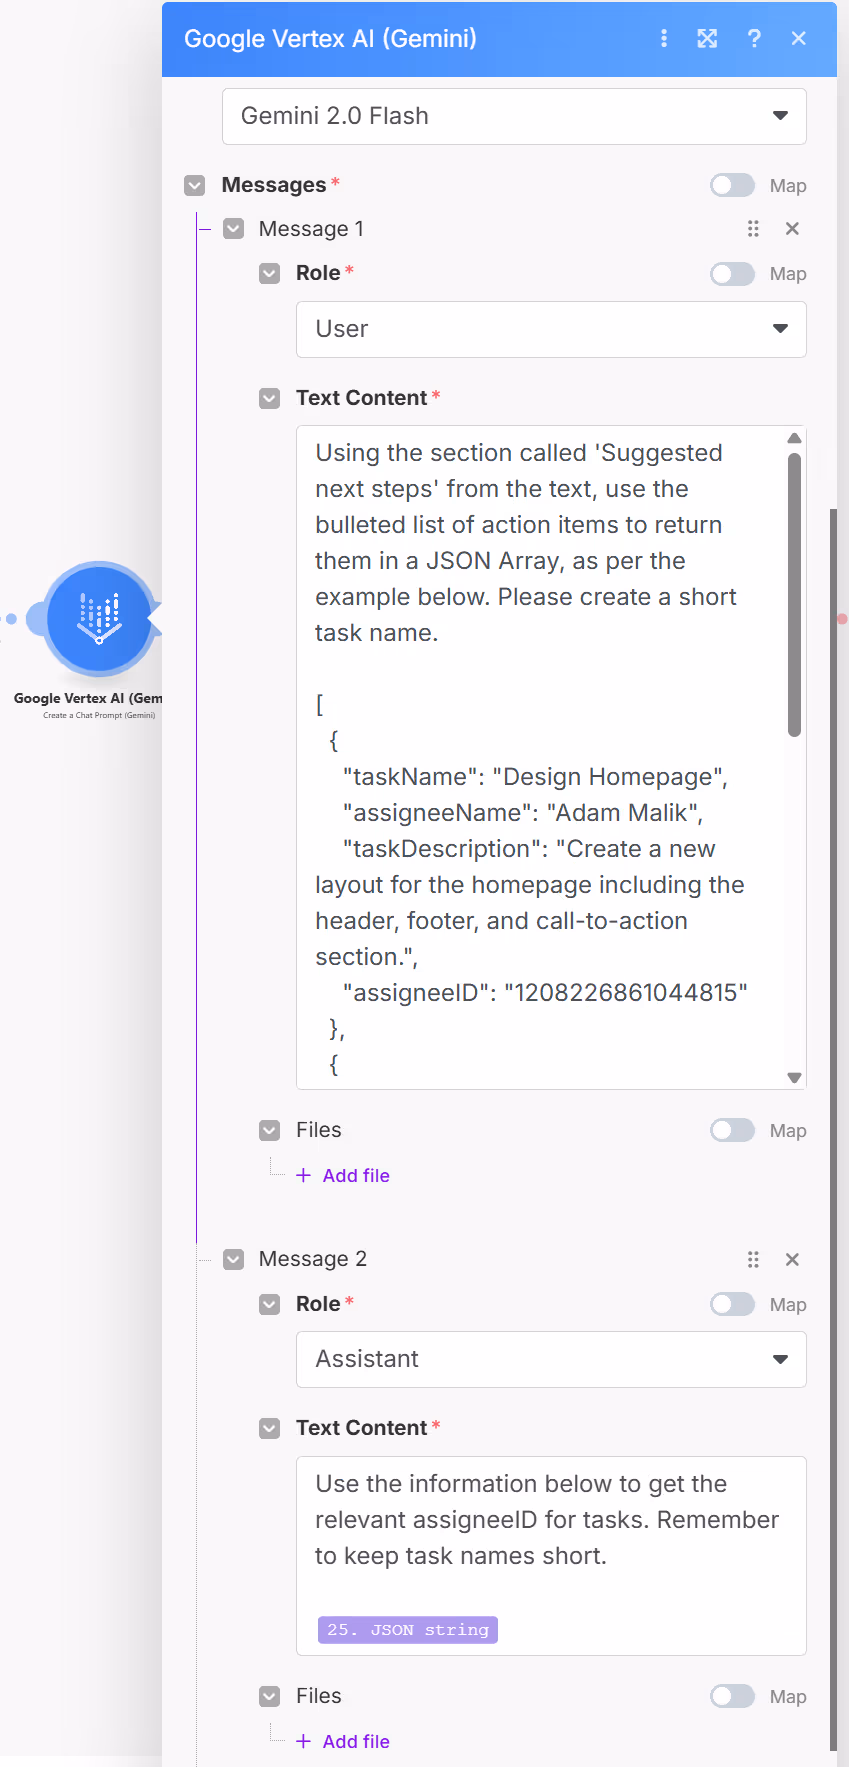
Message 1:
Role: User
Prompt:
Using the section called 'Suggested next steps' from the text, use the bulleted list of action items to return them in a JSON Array, as per the example below. Please create a short task name.
[
{
"taskName": "Design Homepage",
"assigneeName": "Adam Malik",
"taskDescription": "Create a new layout for the homepage including the header, footer, and call-to-action section.",
"assigneeID": "798465056465434"
},
{
"taskName": "Develop API Endpoints",
"assigneeName": "Sin Ling Chan",
"taskDescription": "Implement RESTful API endpoints for user authentication and data retrieval.",
"assigneeID": "456461231035454"
},
{
"taskName": "Revise Social Plan in Buffer",
"assigneeName": "Andrea Talingting",
"taskDescription": "Reschedule social plan to align with the revised content release schedule.",
"assigneeID": "1209456465412"
}
]
The text to use is here:
{{2.text}}
Note: This is the output of module 2. Make sure you use the pain text option from the Google Doc get contents of the document module.
Message 2:
Role: Assistant
Prompt: Use the information below to get the relevant assigneeID for tasks. Remember to keep task names short.
{{25.json}}
Note: This is the output of your user array shown in fig 4
Step 4: Ensure the output is 'clean'
The next step in the Make scenario, as I mentioned in the video, is removing unnecessary text. Occasionally, GPTs can add extraneous text to their output, regardless of how often you specify that you only require an array. Therefore, this step uses a simple regular expression to extract only the information within a recognisable JSON array.
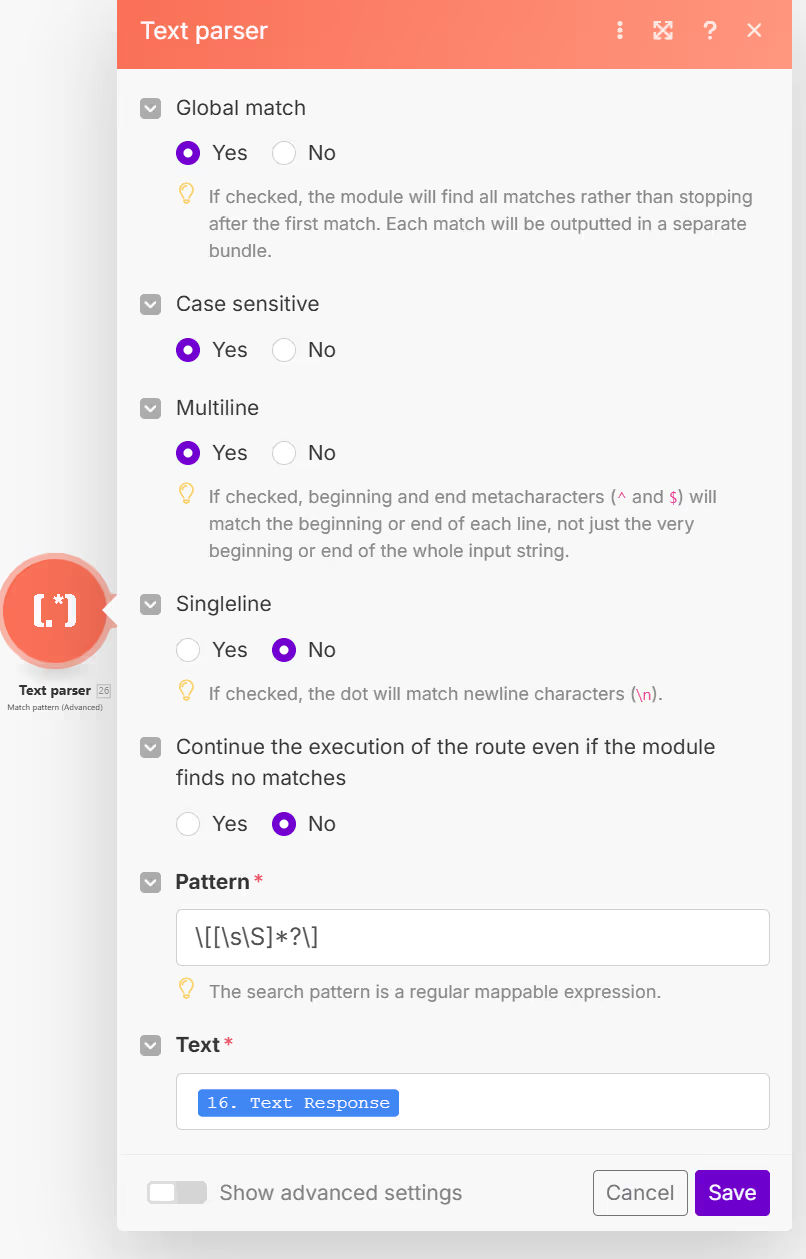
RegEx Used:
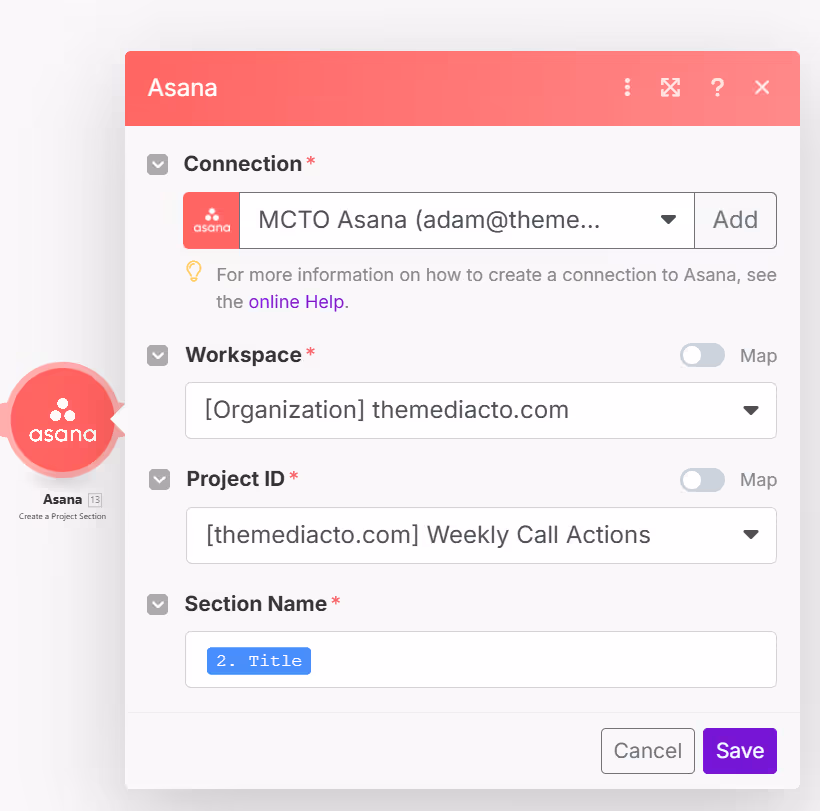
Step 5: Organise things in Asana or your work management solution
The next step is how we've decided to organise things in Asana. This module creates a section in our meeting notes project with the title of the particular meeting being processed; that is all it does.
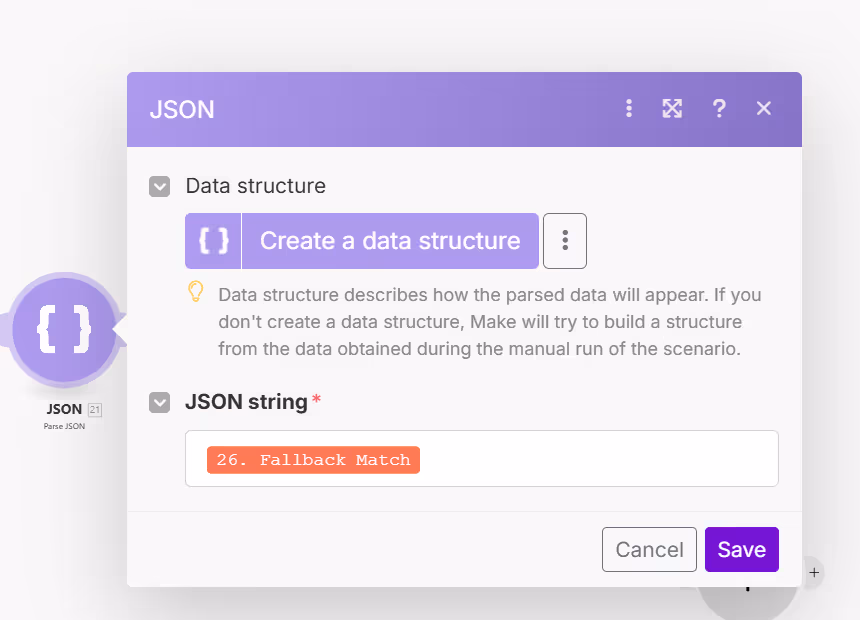
The next module is again just a simple helper. It takes the array and ensures it's pushed into a JSON object that Make.com will understand and won't fail. In naming terms, it's just organising things; it's not really doing anything else.
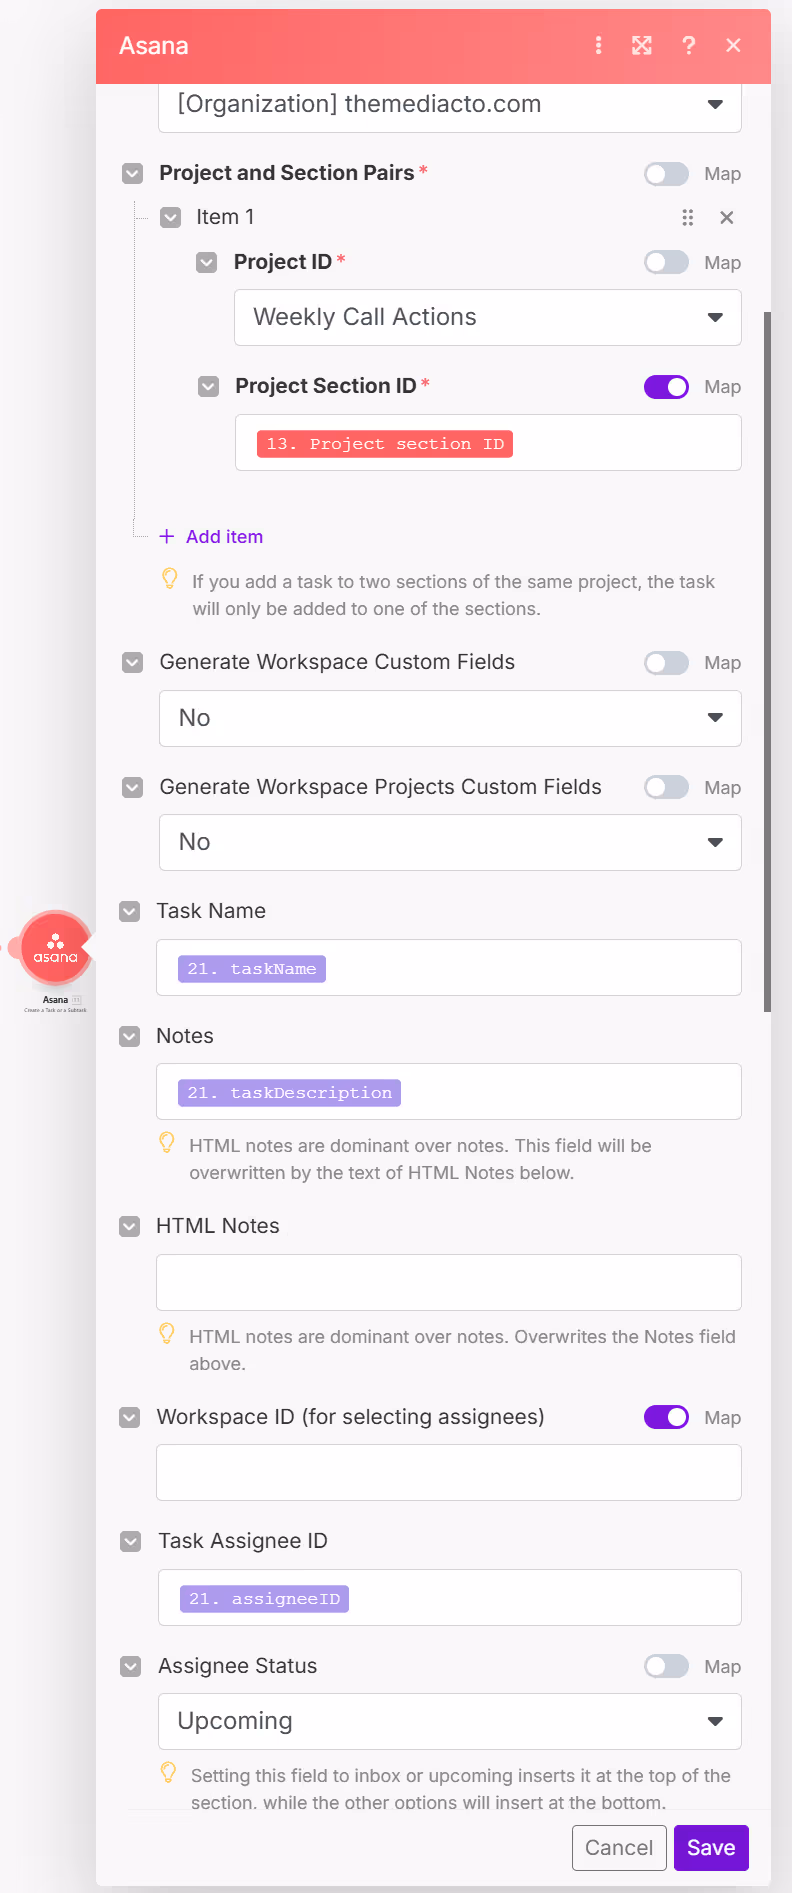
...and the final step is where the information in that array, which will contain the user's name, their ID, their Asana ID, or whatever is required if you're using a different work management tool, is then pushed into the project section that was created in the previous step.
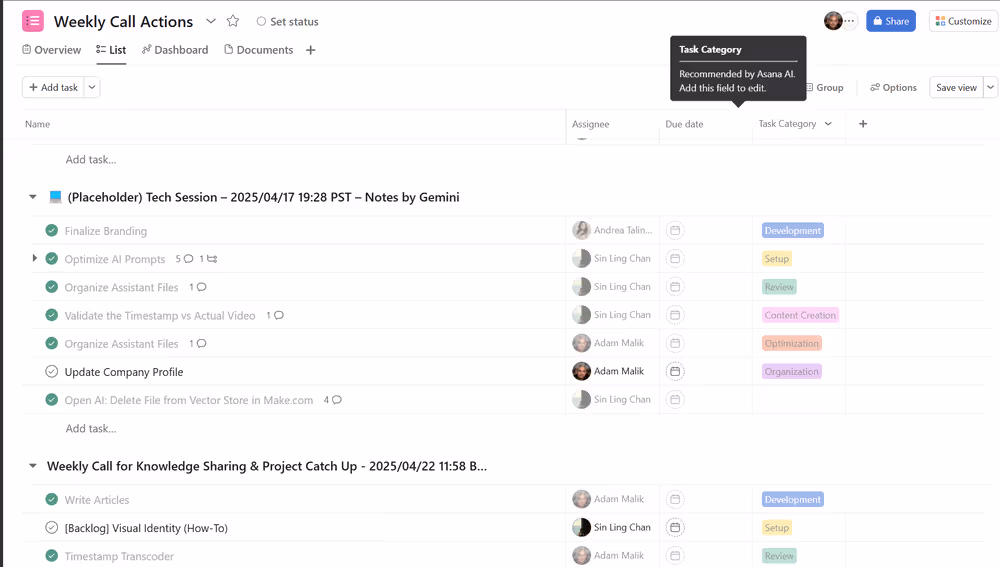
So, we get neatly organised action items from every meeting across the organisation, as shown in our redacted screen grab below.
While we might have included extra details for thoroughness, setting this up is straightforward. You can use the provided prompts and steps to organise it yourself. We hope this will be a valuable time-saver for you.
Finally, you can download the Make.com blueprint of this scenario to save you time.

