
The video below shows you the best way to connect an external application to your WIX website by creating a self-hosted app that acts as a bridge. The method is highly flexible, and while it can seem daunting, it is relatively simple and can be used to connect WIX to virtually any external system, not just n8n. This guide supports the original walkthrough we posted on YouTube.
One benefit you can realise is a simplified Wix site, as it removes the need for extensive front-end or back-end coding that could slow down your site. The self-hosted app manages the connection and interaction with the external system as illustrated in the image below, including permissions and security authentication, all in the background, not to mention more sophisticated workflows and automations than are available to you within Wix.
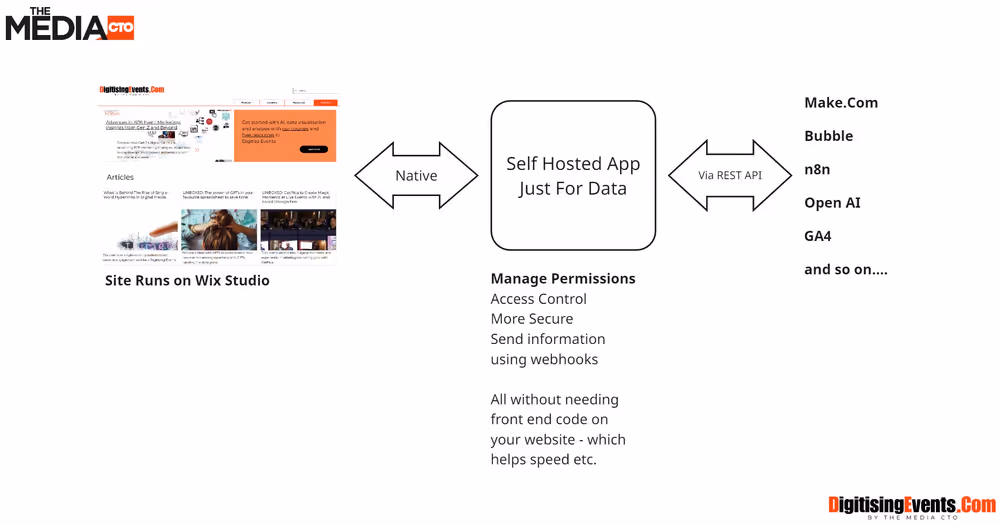
While this may sound complex, it's surprisingly straightforward. The first part of this guide will walk you through connecting n8n to your Wix site using this approach, which you can adapt to connect any other system to your Wix site. If you're using other automation systems like make.com that have native Wix connectors, this method still offers a viable alternative for establishing the connection.
Step 1: Setting Up the Self-Hosted App
Note that these screenshots and our demo were recorded on Wix Studio; the user interface looks slightly different on non-Wix Studio sites. You can follow these steps on our YouTube tutorial.
To begin, log into your Wix Studio dashboard. Here’s how you can set up your self-hosted app:
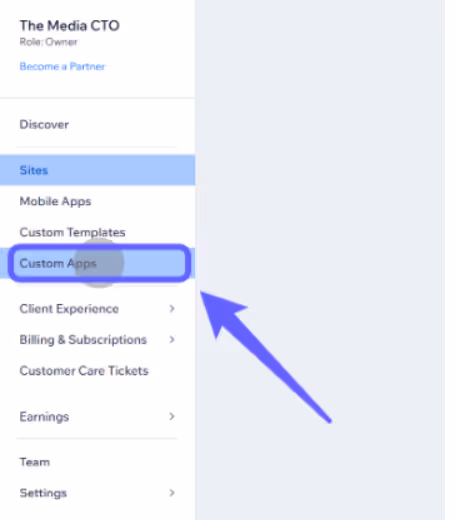
Click on Custom Apps in your dashboard.
Select Create New App and choose to build from scratch.

Select Build From Scratch

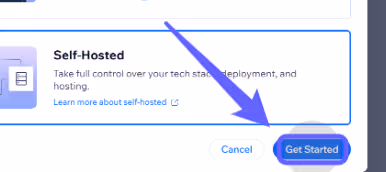
Select the Self-Hosted option
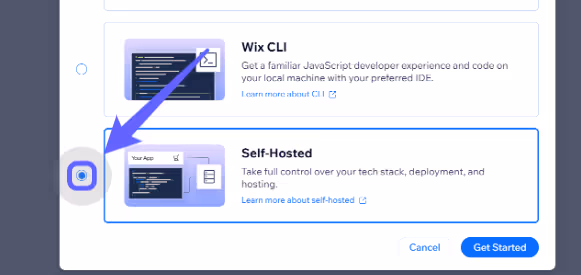
And click get started
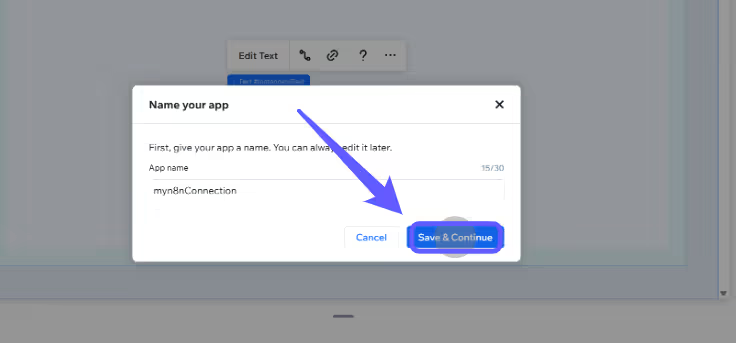
Optionally, You Can Rename your App:
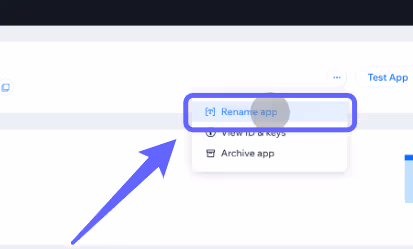
For example myn8nConnection

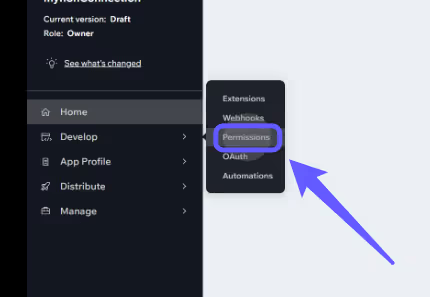
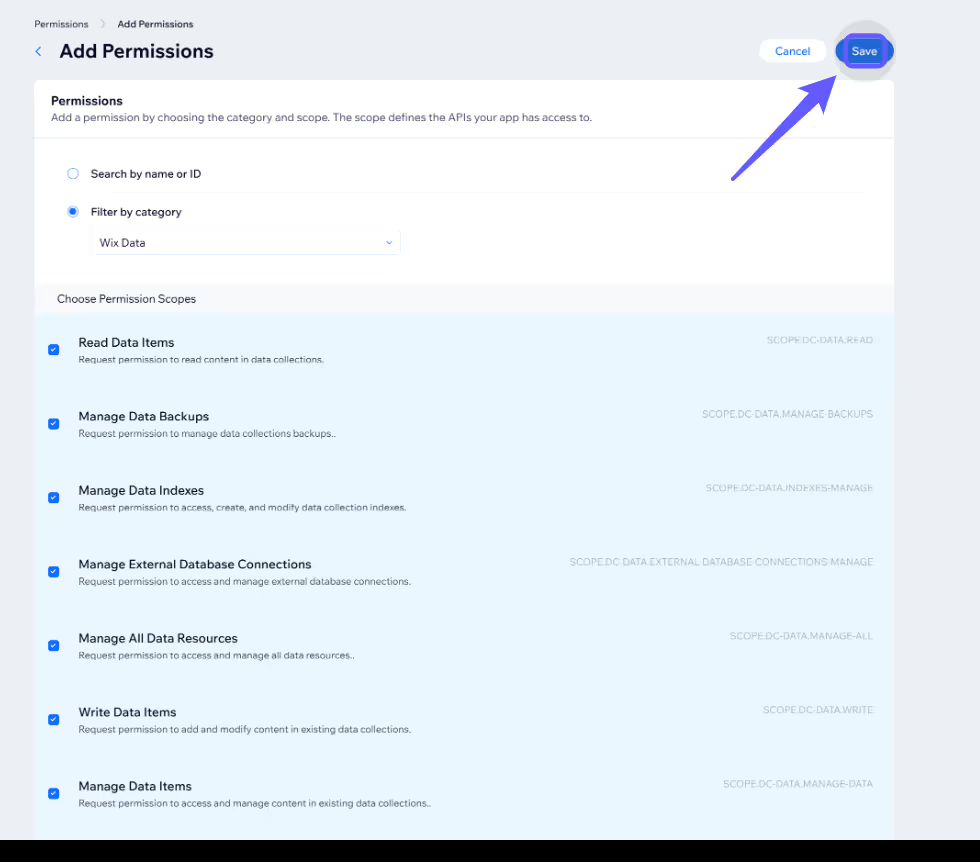
Now you need to set the permissions for your app. This is an important step as these permissions determine what you can do with your app and the information it can access from your website. In this example, to create the connection, we only set Wix-Data permissions, but you can set more or fewer permissions as you require.
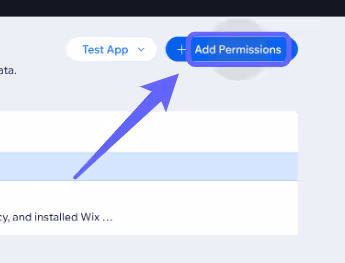
Select Add Permissions
Filter by category and select Wix Data or whichever permissions you need (Wix Data is used in this demo)

Select all Wix Data permissions and hit Save
This is the next important step, in order to create a connection with your App, you will need the App Instance ID (this is unique to each site the app is installed on_ To get this, we create an extension and paste in some code to give us this ID.
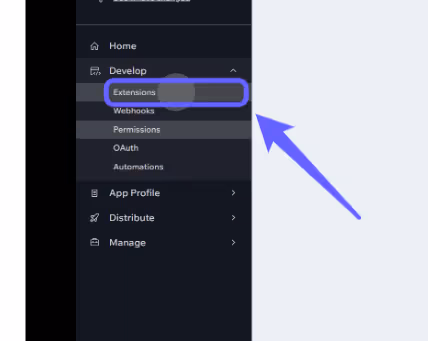
So, click on extensions.
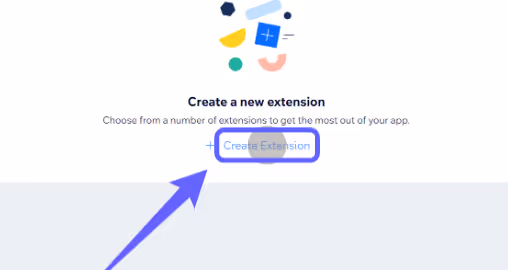
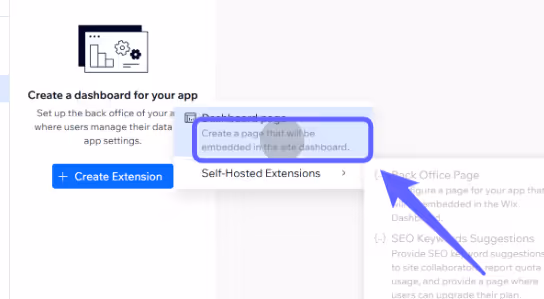
Now, Click on Create Extension
Choose Dashboard and Choose Dashboard Page Create on Blocs
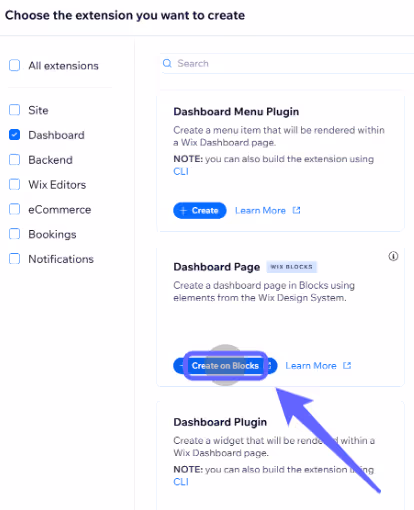
Now, Create a Dashboard Extension
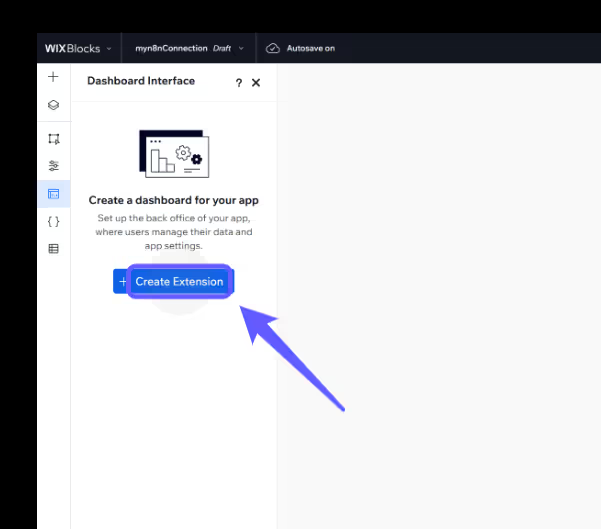
And select Dashboard Page
You will now see a blank dashboard page a bit like this:

Now we are going to add a text element, the sole purpose of this text element will be to serve as a container to show the App Instance ID
So add a text element as you would on your Wix Studio site:
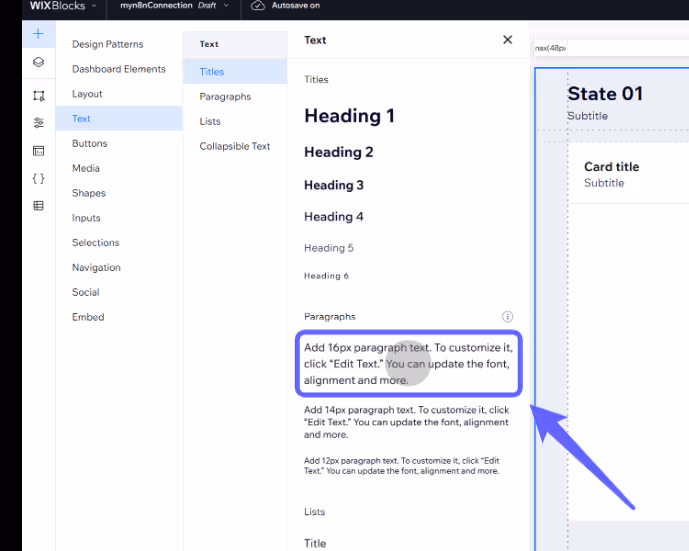
Position and change the default text as you like:

Now open the code panel for this page as shown below:
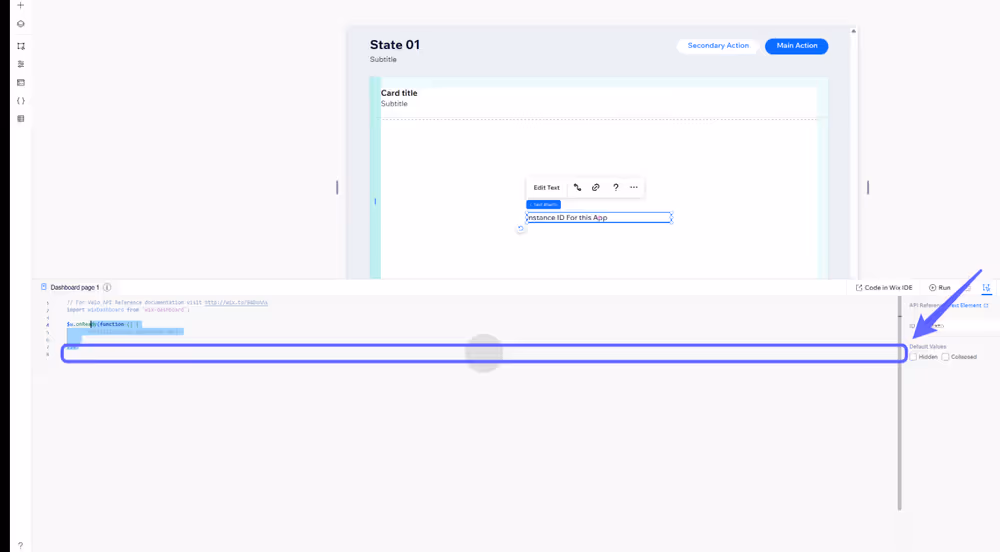
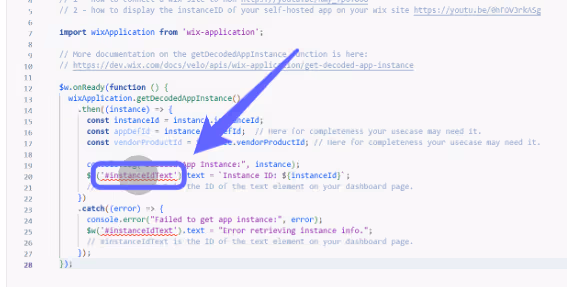
Remove all the existing code and paste the code snippet below:
You can get this from our GitHub:
https://github.com/MCTO-the-dig/wix/blob/main/codeToDisplayInstanceID
Caveat: GitHub will be updated, code below may not.
// The code below is added to a dashboard page on your app
// It will write the instanceID to a text box with the ID of instanceIdText
// Referenced in two video tutorials:
// 1 - how to connect a wix site to n8n https://youtu.be/Rmy_7poY80U
// 2 - how to display the instanceID of your self-hosted app on your wix site https://youtu.be/0hFOV3rkASg

import wixApplication from 'wix-application';

// More documentation on the getDecodedAppInstance function is here:
// https://dev.wix.com/docs/velo/apis/wix-application/get-decoded-app-instance

$w.onReady(function () {

  wixApplication.getDecodedAppInstance()

    .then((instance) => {

      const instanceId = instance.instanceId;

      const appDefId = instance.appDefId;  // Here for completeness your usecase may need it.

      const vendorProductId = instance.vendorProductId; // Here for completeness your usecase may need it.

    //  console.log("Decoded App Instance:", instance);

      $w('#instanceIdText').text = `Instance ID: ${instanceId}`;

	  // #instanceIdText is the ID of the text element on your dashboard page.

    })

    .catch((error) => {

      console.error("Failed to get app instance:", error);

      $w('#instanceIdText').text = "Error retrieving instance info.";

	  // #instanceIdText is the ID of the text element on your dashboard page.

    });

});
When you have pasted the code, you will need to make sure the ID of your text element matches what is in your code:
So, select the text element and change the ID from the default
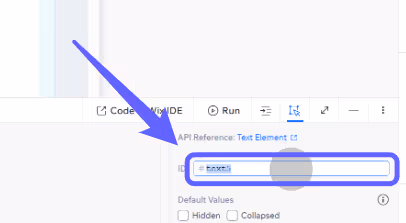
To the reference in the code
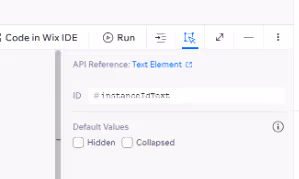
In this example, ‘instanceIdText’
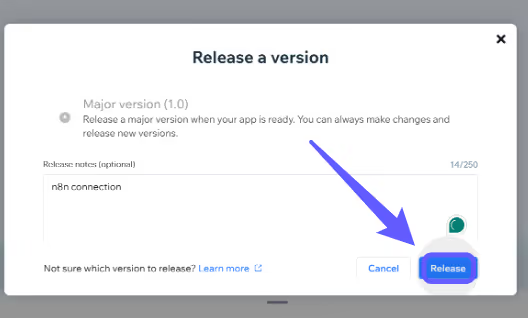
Now all that is left is to ‘Release’ the app.
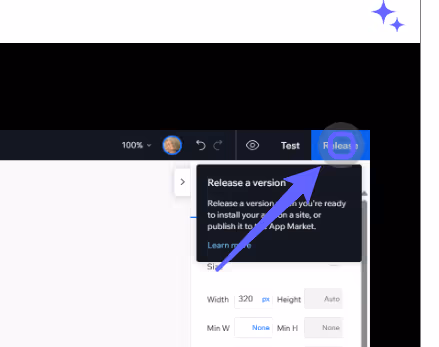
Hit save and continue in the next dialogue
And Click Release
Now you will need to select the site you want to connect with:
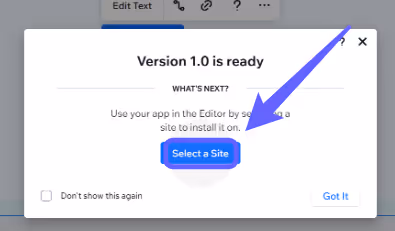
Select the relevant production site
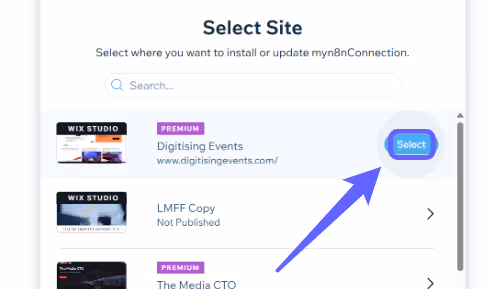
And Install your APP

Now it is installed, go back to your dashboard using the navigation from the editor:
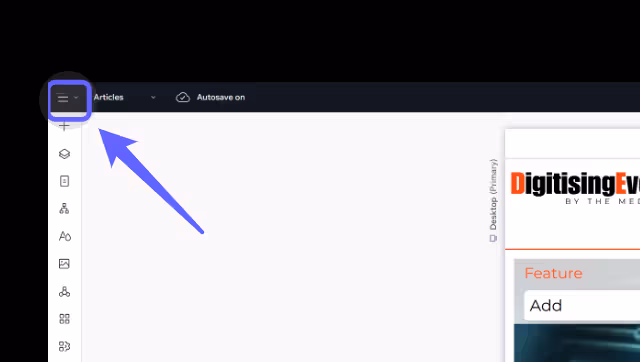
And you will now see your app as a menu from your dashboard:
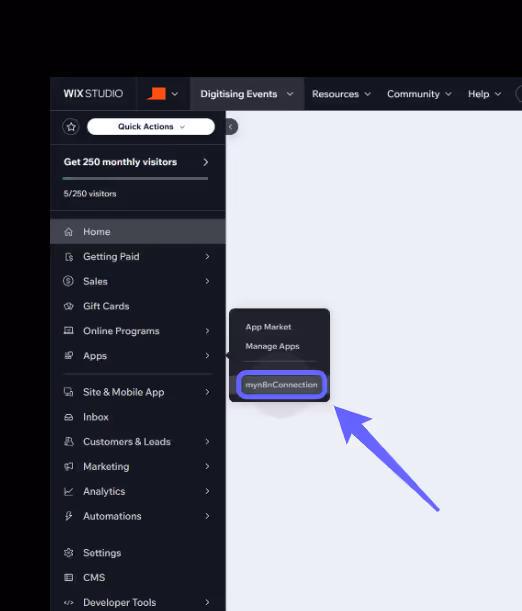
When you click on this, you will see the card with the instance ID for the app.
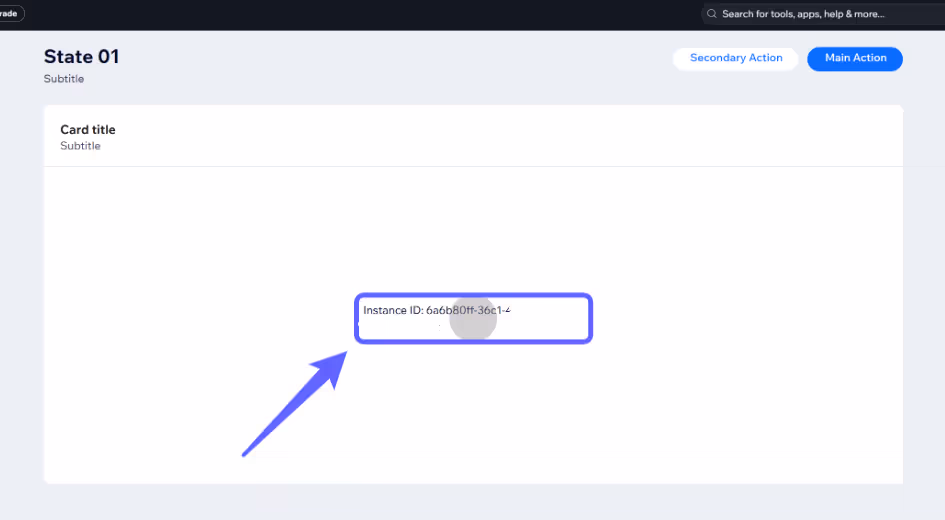
You've now created the app and have a way to get the App Instance ID. The app has all the permissions needed for your specific use case. In this demo, we're only using Wix data, but you can put in whatever data you'd like.
The Instance ID is important because it's a key component in authenticating to your app with an external system. To do this, you'll need three things: the Instance ID, the App ID (found in the App Dashboard), and the App Secret (also found in the App Dashboard). Once you have these, you can set up an OAuth connection within n8n, which is the next part of this guide.
Remember that when creating an app, it automatically generates a frontend widget, which causes the site editor to open upon installation. If you're familiar with the process and want to avoid this, simply delete the frontend widget from the app before installing. The crucial element is the dashboard page containing the code, which displays the current app install's instance ID. This additional information is just for your reference.
BONUS: The APP Instance ID defines which site you are connected with. You could have one app installed across multiple production sites, so you would not have to do this for each site. For example, one app with Wix data permissions can be used across many sites.
t can also deliver greater efficiency within your business in terms of communicating with site visitors and responding to events on your website.
Next Up: Connecting the APP to n8n
To make the connection, we will authenticate and connect with your app using OAuth as documented on Wix. You can jump to this section on our YouTube tutorial.
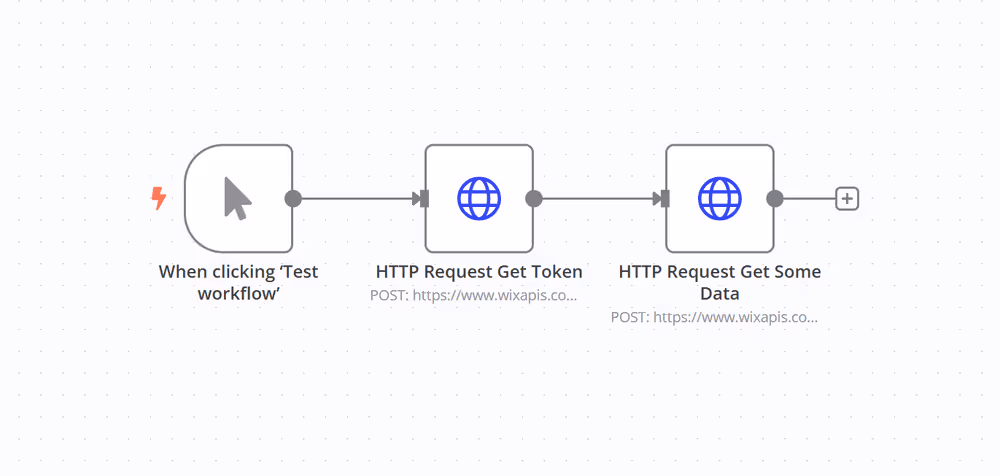
In this n8n example, we'll use a manual trigger instead of an active one (in production, the trigger can be whatever event you choose). The second step retrieves the token required to connect your app to n8n and then fetches data from your website. This second step is just an example; with the correct permissions, you can retrieve users, products, store items, or any other data you need.
A brief explanation of Bearer Tokens
For those who may not be familiar, here's a quick explanation of what bearer tokens and app instance IDs are, and why they're necessary.
Essentially, they provide a secure method of interacting with your websites. By combining your app ID, app instance ID, and app secret, you can generate a unique authentication token. This token, which in Wix's case lasts for four hours, allows you to make calls to your website without needing to regenerate it for that duration.
Or, to put it another way, they are like a secret and unique key you are given, which only exists for a specified period of time to do a job or access a system.
This process is implemented for security reasons. It ensures that a new, unique token is generated for each call made to your website. While this does add a layer of complexity to the connection process, it significantly mitigates security risks.
Once you understand the underlying concept, it becomes easier to manage over time.
Creating the n8n Workflow
1. Log in to your n8n account and create a new workflow.
2. Set the trigger to manually start the workflow (you can use whatever trigger you like in production)
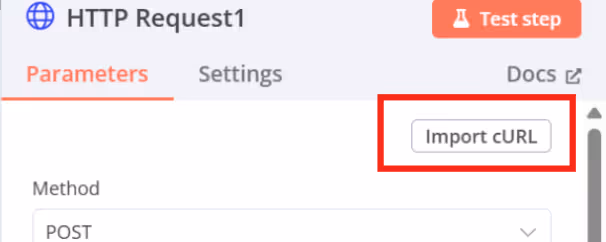
Now, add an HTTP Request node
The easiest way to set this up is by clicking on the Import cURL button on the HTTP Request node:
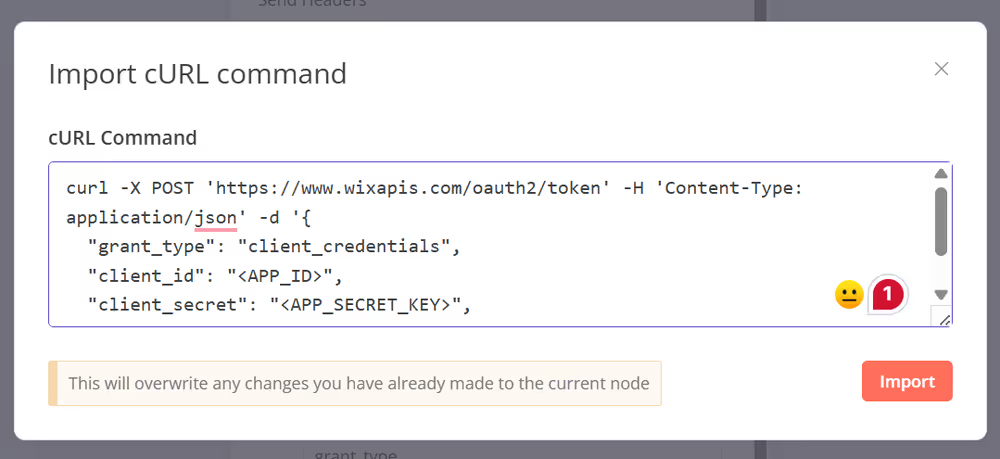
And pasting in the cURL from the Wix Documentation
https://dev.wix.com/docs/rest/app-management/oauth-2/create-access-token
Copied here for convenience:
curl -X POST 'https://www.wixapis.com/oauth2/token' -H 'Content-Type: application/json' -d '{
"grant_type": "client_credentials",
"client_id": "<APP_ID>",
"client_secret": "<APP_SECRET_KEY>",
"instance_id": "<APP_INSTANCE_ID>"}'
And paste it in as below:
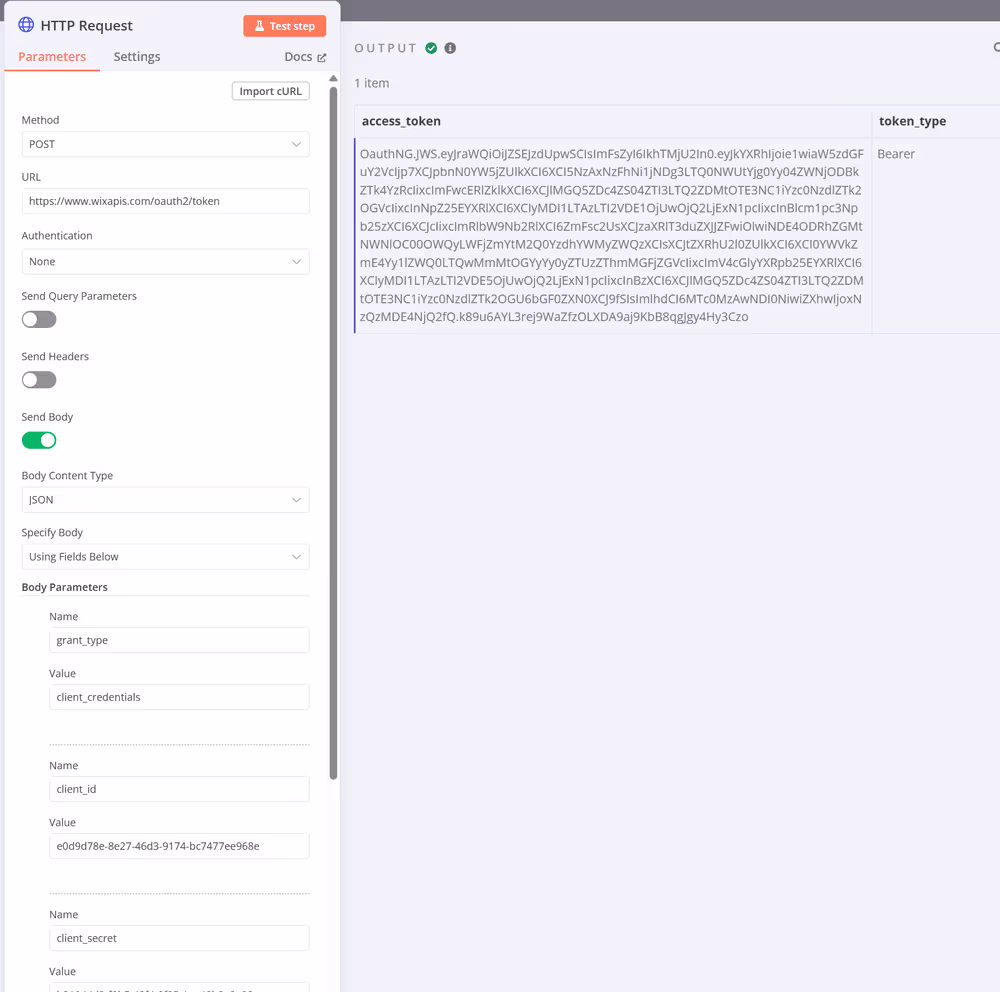
And hit Import, you will now see the HTTP Request node prefilled like this:
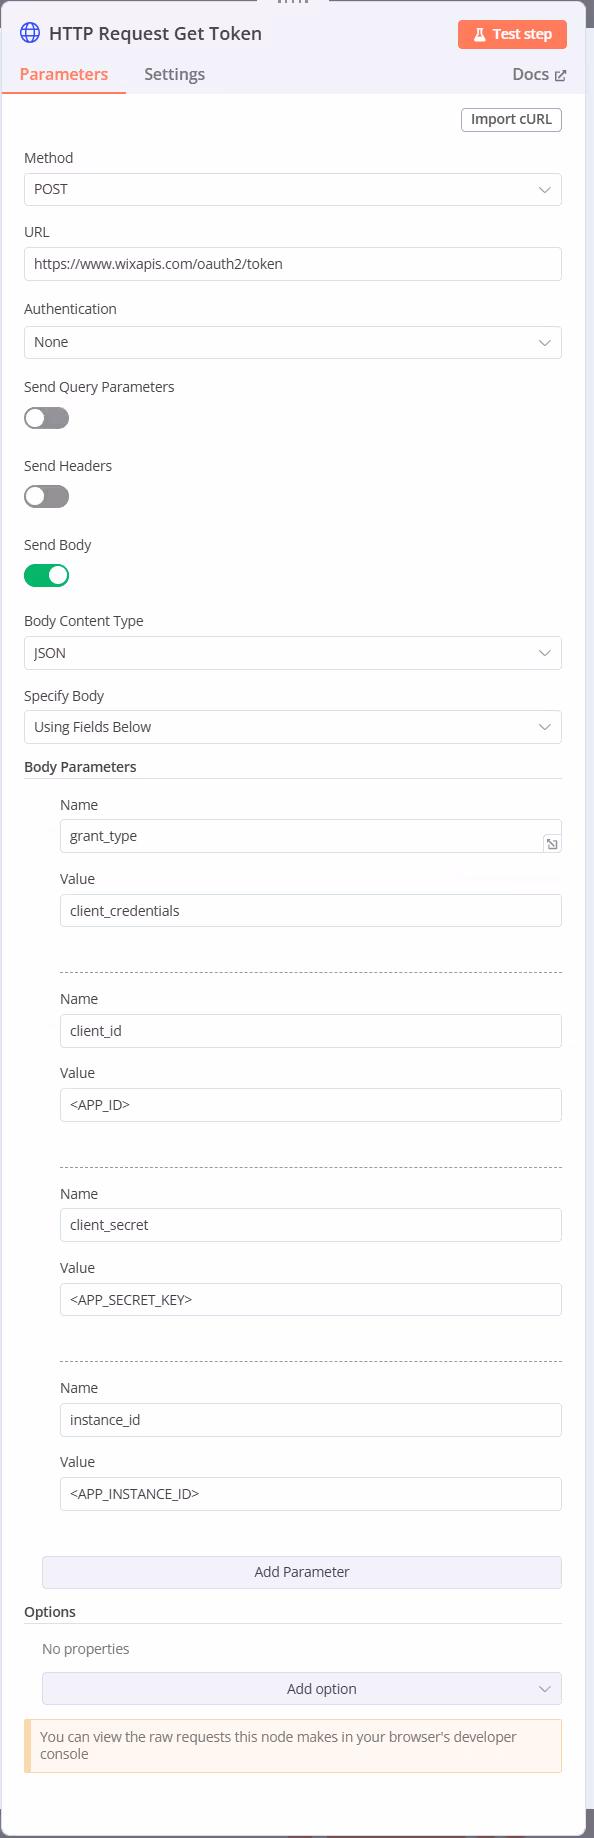
You will need to replace:
<APP_ID>
<APP_SECRET_KEY>
<APP_INSTANCE_ID>
With your unique information:
You Get:
<APP_ID>
<APP_SECRET_KEY>
From the app dashboard page, as below:

You find this by going to

On your custom APP
And the is what you see on your app dashboard page by selecting the APP you created from your Wix Site Dashboard:
So the values in this HTTP request node should look something like this:
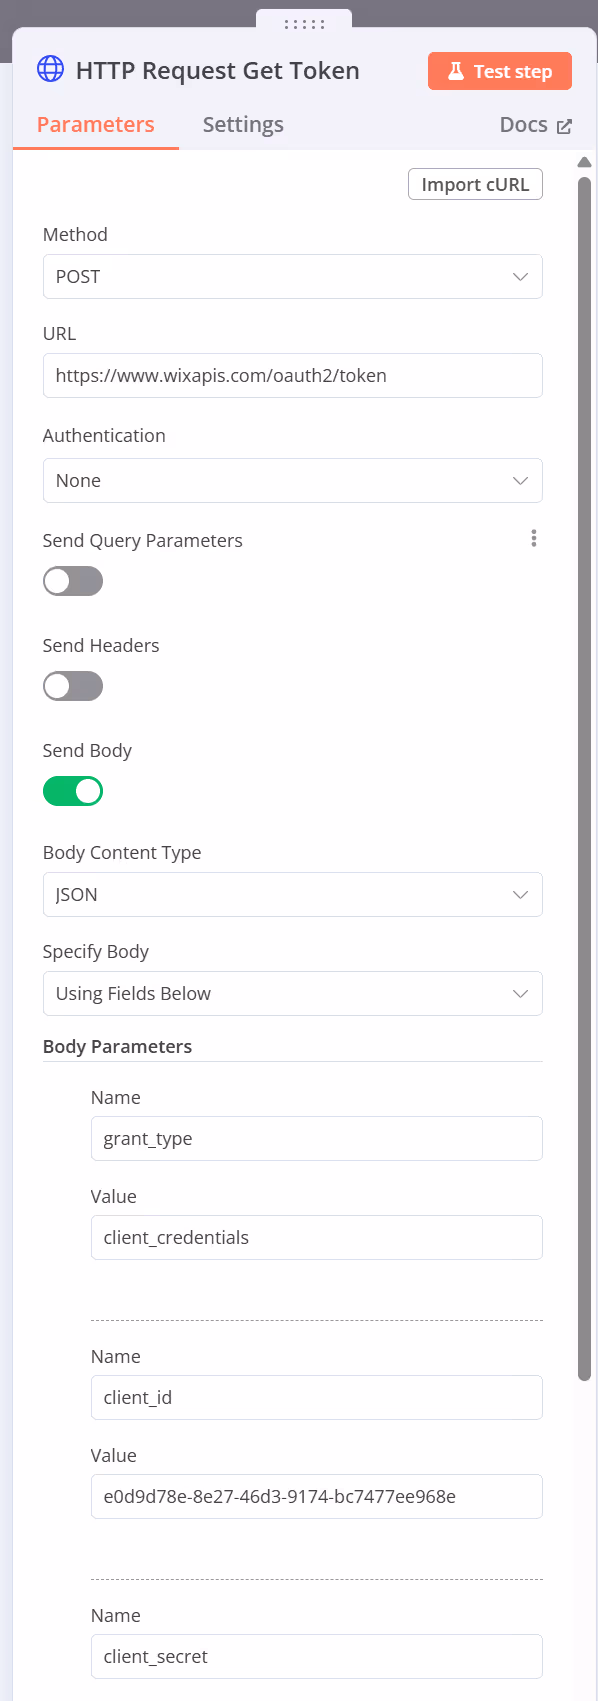
And so on
You are now ready to test this, and if you have put in everything correctly you will get an access_token as in the screenshot below:
Now that you have this, you can start getting information from your Wix website. To demonstrate this, we will add another HTTP Request node to do a Wix data call to get items from a collection.
Do the same thing you did the last time and copy and paste the cURL from the Wix REST API documentation here:
https://dev.wix.com/docs/rest/business-solutions/cms/data-items/query-data-items
Or for convenience here:
curl -X POST \
'https://www.wixapis.com/wix-data/v2/items/query' \
-H 'Content-Type: application/json' \
-H 'Authorization: <AUTH>' \
-d '{
    "dataCollectionId": "cities",
    "query": {
        "filter": {
            "state": "California"
        },
        "paging": {
            "limit": 2
        }
    }
}'

// Note 'cities' and 'California' are just examples replace with your dataCollectionId and so on,
// however this will give you the correct structure in n8n
Make sure you change the Authorisation to reference the token generated by the previous HTTP Request node, like this, and replace the dataCollectionId, etc., from the example above with a collection and fields that exist on your site.
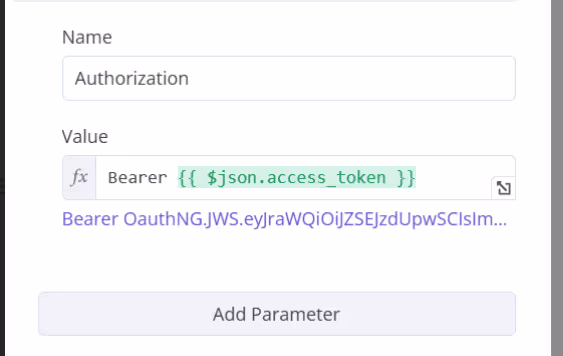
IMPORTANT: In Wix, you must add the word "Bearer" before the token. Unlike other systems, do not add : or capitalise—it will fail.
If you have everything right, you will see a result like this, which has pulled all the data items from a collection.
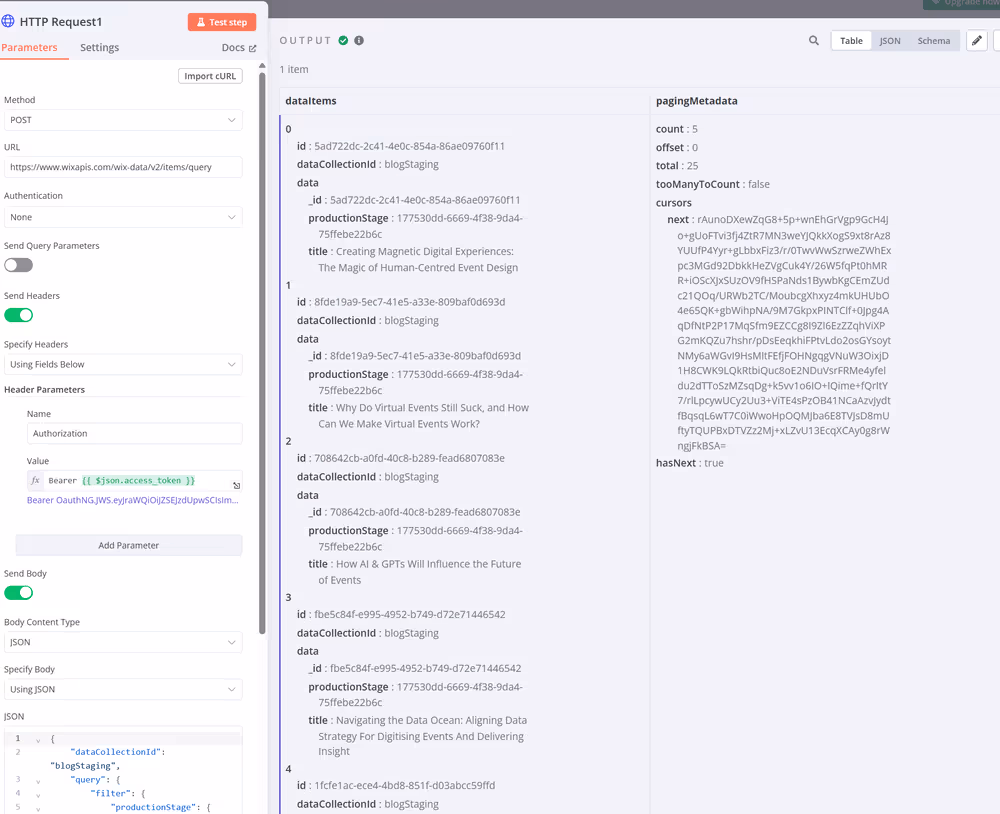
And that is it. You can now interact with your website using any of the methods defined in the WIX REST API. Remember to set the appropriate permissions based on your goal.
Finishing off you now have a functioning connection with n8n
You now have an app to control access to what you want it to do on your website and to authenticate with an external system. As we've demonstrated here with n8n, you can access any of the methods described in the Wix REST API once this connection is established. This API is very extensive so that you can do many things.
For example, when a registration comes in at Digitising Events, we can pull all the information associated with that registration, send it to a different system, and send a personalised welcome and thank-you message. Alternatively, if someone has bought something, we can trigger an action for a different department to follow up.
The power of this approach lies in its ability to facilitate more sophisticated automations and create deeper, more personalised experiences than are possible within Wix alone. It can also deliver greater efficiency within your business by communicating with site visitors and responding to events on your website.

